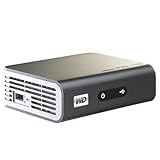
Western Digital TV Live HD Media Player
Posted by Notcot on Jul 24, 2010 in Home Cinema & Video |
Gizmos, Gadgets, Noir and Steampunk
Western Digital TV Live HD Media Player
Posted by Notcot on Jul 24, 2010 in Home Cinema & Video |
5 CommentsReply |
|
Copyright © 2024 Notcot All rights reserved. Theme by Laptop Geek. Site by I Want This Website. | Privacy Policy.
I’ve read a few reviews where some people have had problems with the WD Live TV device. I have to say I’ve had no issues whatsoever and thought it might be useful to share my setup to give people confidence to try this amazing little box.
Here are the steps I went through to get everything working.
1. WD Live TV device: Firstly I installed firmware version 1.01.11 (There is/was a version 1.01.12 but this has problems so I would stick with 1.01.11 for now). When I first got my device I went to the Western Digital website and downloaded the firmware onto a USB stick. Once I had the device attached to the TV I plugged the USB stick into the device and it immediately popped up on the TV that a new version of firmware had been found and let me install it. I would recommend doing the first firmware update this way, even before hooking up the network connection.
2. The WDTV device is very fast at detecting where media is. I did my first test by copying a few photos, music tracks and a film onto a USB stick and plugging it in to the device. When I went into the Photo menu I could select the USB stick and display the photos, likewise with the film and music. Okay so far so good – time to network.
3. My ultimate plan was to go wireless, but I like to keep things simple to start with so I switched off my WDTV device then plugged a wired network connection (i.e. Cat 5 network cable) into the network port on the back of it, and the other end into one of the network ports on the back of my Internet Router (Netgear WGR614). This might not be practical for some people due to the length of cable that you would need. My WDTV is only about 10 feet from my router, if its not possible you might have to go straight to wireless (outlined below). This is where things get slightly techie. You need to check your WDTV device is getting allocated an IP address by your router. Once you have both ends of the network cable plugged in, switch on your WDTV box and then use the menu to go into Settings and the Network and choose to Check Network. Fingers crossed the device should show you an IP address and Gateway (your routers IP address) and DNS servers. These are all allocated by the router. You need the IP address for accessing local media (i.e. on your computer). The gateway and DNS are required for accessing YouTube and the like over the Internet. If you have all these allocated – great! If not, you need to do a bit of trouble shooting. There can be various reasons but they pretty much all come down to how your router is configured for allocating IP addresses. Checking the DHCP configuration on your router is the first thing, also check anything that would not allow the WDTV device to connect, such as an access list.
4. Okay lets assume you now have a network connection and IP address etc. If you select the Video option you should now be able to select YouTube. See if you can stream a YouTube video. Pretty cool, eh! If its not working double check the network settings are correct especially DNS and the gateway. These should match the ones set in your router.
5. Okay so you can connect to the Internet, but how about all your local media – photos, music etc. Well you need to ensure they are shared. The WDTV box will detect PCs on your network and let you find media on them. I’m running Windows 7 on my home network but Vista and XP should all work fine too. I’m not going to go into all the details of how to do this but you need to make sure the folders on the computer that contains the media are shared. If you right click on a folder containing your media you will see the option to set up Sharing. Make sure you have done this for every folder you want to access from the WDTV device. Tip: Put all you media in folders called Music, Films, Photos etc and place all in a folder called something like Media, then set the Sharing on the Media folder and everything below it will automatically be shared. With Windows 7 there are other options for media streaming which you could explore also.
6. Right, once the sharing is setup on your PC you can go to the WDTV device and it should now be giving the option of Shared Folders under the Photo, Video etc menus. You should now be able to play and listen to your photos, films and music. There are two final steps, both optional, to complete your setup.
7. Going wireless. This took me all of 30 seconds! I used a Buffalo Airstation Nfiniti Wireless-N Ultra Compact USB adapter (The Western Digital website has a list of tested USB wireless adapters). Switch off the WDTV device, unplug the wired connection to the router and pop the Wireless USB adapter into one of the USB ports on the device. When you switch back on, go into Settings, Network and it will ask you if you want wired or wireless. Select wireless and the box will then search for a wireless network. Obviously you need to be able to pick up your wireless network from where the box is located, but assuming this is the case and you have your wireless enabled on your router you should be able to browse the network just as you did when you were wired. Depending on the security on your wireless router you will probably be asked to enter the encryption passcode that you setup when you first configured your wireless network. Techie Tip: You should use WPA encryption if your router allows it. WEP is much less secure. If you have no security setup you should get it enabled immediately otherwise everything you just shared on your PC can be accessed by anyone within range of your wireless network. Not good!
8. So that’s it. Sit back and enough streaming your media to your TV……Oh there is one last thing you could think about. I can’t be bothered having to switch on my PC every time I want to view photos or listen to music etc. This is where you could consider getting a NAS box. I have a Buffalo Linkstation with a 300GB disk. I’ve put all my media onto this and setup to share on the network. The WDTV device finds the shares on the Linkstation just as if they were shares on a PC.
So there you go. I hope that gives you confidence that the WD Live TV device is capable of doing what you need it to do. Yes, if you are unfamiliar with the basics of networks you may need to do a bit more work if you encounter a problem but I have to say it does work very well and worth it. I’m looking forward to what other Internet services Western Digital might add in the future. Enjoy!
Rating: 5 / 5
I bought this for my front room which has the router in it and so would be good for the network facility. I already have a Western Digital TV HD 1080P Media Player for the back room and have been very pleased with it, running very well from a portable USB 500GB drive mainly.
The WDTV Live works fine from an external drive just like the vanilla WDTV.
Youtube works straight out of the box.
However, the networking takes quite a lot of fiddling to get it sorted out. (I have Windows 7 by the way). Straight out of the box, it works with something called Media Streaming, where it seems to pick up files and folders from your PC that the Windows Media Centre already knows about. Avi files are fine, but it won’t recognise MKV files this way. In order to get MKV files, you have to use Network Shares. This took a lot of tweaking, and reading forum posts. Eventually, it could see my shared folders and play the MKV files very well over the network. Curiously, I had to rename my Video folder to !Video – it seems to have a problem with letters of the alphabet above M ! And I had to tell it to connect to my PC using my log-in details I use to start Windows 7, rather than the easy anonymous option.
Finally the output sound can be set to either Stereo or Digital. If I use Digital, there is no sound over the HDMI to my TV for a file with digital sound (eg a MKV). Not a major problem for me as I use my digital surround amp most of the time anyway. (This may be a problem with my Toshiba XV635 tv though).
Apparently there will be a firmware upgrade soon which may help.
Overall: stick with the WDTV if you don’t need the network. If you are planning on using the network options – be prepared to fiddle about.
Edit: 4 days later, a new firmware which seems to have sorted out most of those network niggles! It found the upgrade automatically – I recommend you upgrade straight away. Add at leat 1 star to my original 3 stars.
Rating: 3 / 5
Released Nov 2009. It improves on the older WDTV with faster operation and network ability. Avoids the need for a PC under the Living room TV that needs booting up everytime you want to watch a movie or having to plug your laptop into the TV’s HDMI. It also streams via a wired network (or a nearby wireless router) and caters for a lot of codecs and containers within its own transcoding chip – which means your host PC or server can be as slow as a dog, as it only needs to serve the data to this unit, not transcode it.
The unit doesn’t ship with an HDMI cable, so remember to pick up one of those at the same time. Don’t pay too much for HDMI cables, you won’t notice any different. Digital signal isn’t affected by cheap cable in the same way analogue was). It’s Networking capability was automatic, as soon as I plugged in the network cable, it found the DHCP server on my cheap router and all the shares in my house, including some folders I’d forgotten about!
Your NAS disk, NAS server or PC hosting can be anywhere on the network. Full HD 1080P plays in fantastic detail. You can stream from the network using windows shares or it will recognise any host media servers via UPNP (video) and DAAP (audio) protocols. I found my Linux NAS shared as a ‘windows share’ recognized more video file types than the media sharing via UPNP. Perhaps my NAS server just isn’t passing all the possible MIME types, via UPNP, that this unit can play.
It will also play from a USB disk or flash memory plugged into the back or side (so you can even plug your camcorder AVCHD memory card straight in and play) and there are menues that allow you to copy files from source to target on the network or attached direct to the box and you can ‘see’ the WMDTV Live device (and it’s flash or USB disk) from windows or iTUnes, so you could moves files onto the disk and off without any unplugging or carrying of drives and media anywhere.
The box also has a YOU TUBE menu (using xml rather than a html web image) and allows access to most voted, recent, most favourites or you can SEARCH yourself using an onscreen keyboard from the arrow keys on the remote (a little fiddly). The you tube novelty can become addictive on a large TV and only to be used when there really isn’t anything on the TV. There is not BBC I Player, on this – so don’t get too carried away.
The unit plays MKV files without a problem – DVD and Blu-ray backups (including multichannel audio and subtitle information that can be selected from the options menu) and plays AVCHD .m2ts, divx, xvids, vobs, files and DVD ISO’s. It won’t pick up the menu’s or chapters for ISO images but will allow you to find a chapter in an MKV file from its options menu.
Photos play with a slideshow (although you have to use PLAY not ENTER and there’s a random choice of transitions in the options menu). Not as nice as the XBOX slow pan-and-zoom playback but crystal clear.
Overall, I would recommend this, though its still more of a GEEK’s present than a family item. Shame it’s so expensive, it feels to me like it should be priced in the £58.99 bracket. There are some minor niggles with firmware – not video sync/freezing type of bugs, but more ‘user ease of operation’ types, which mainly can all be addressed with firmware and there is an active forum on the net for this device.
My Minor Niggles [Firmware 1.01.11 Nov 09]
1) When connected to the network, it keeps asking you to choose a share type and storage device whenever you select a new media type to view when switching it on, this doesn’t make it ‘family friendly’ as they don’t want to be hit with an array of share type questions and having to choose the correct distant storage devices when they just want to watch a movie.
2) You can’t pre-set specific shares i.e. one share for photos, one for video. It just shows all possible shares for everything
3) Although DTS and Dolby digital can be put on pass-through to the sPDIF socket or ‘Stereo’ for down-mixing to composite and HDMI, I still found WMV HD 5.1 files that wouldn’t play audio via network stream (maybe it doesn’t like WMA 5.1 and prefers AC3 instead)
4) Pressing PLAY (rather than enter) will play all video files in a subfolder, but it isn’t ‘gapless play’. Every file starts with a black screen announcing the sound type e.g. MPEG II ACE 5.1 and it takes about 10 seconds before the next file plays, a real pain if you have a string of AVCHD camcorder files to watch [That can easily be addressed in firmware]
5) folder.jpg shows up (sometimes) as a thumbnail for the folder. But a video file for the thumbnail having the same name is supposed to show as the thumbnail but shows as a duplicate file. Would be nice to see films as video covers than windows listings.
6) FWD and NEXT would be nice if it took you to the next chapter and not the next media file.
Rating: 4 / 5
I just got this product, and have to say it does EVERYTHING right. I plugged it in, made some small adjustments on the settings (like picture resolution, digital audio, subtitles off by default, etc) and so far I’m very impressed. I did notice that as soon as I plugged it in there was a firmware update which I did. Everything went smooth and without any issues. Now in regards to some of the issues others have identified reviewing this product… if you have shared drives on the network with video content (as I do) and if you use Windows Vista/7 trying to access them. The login security issues are 100% windows related. This player is not at fault for MS changing the shared drive access permissions and making it more difficult for external devices to see and access your shared drives. My XP computer (with many shared drives) worked the first time, no issue at all.
Also I have to say that the HD content works SO well… very smooth video, no jumping, no issues. I am extremely happy with this product and highly recommend it!
One thing I hope they add in future firmware updates is the ability to jump forward in a movie 3-5 minutes at a time instead of just fast forward x2,x4,x8. This jumping works so well in XBMC and I wish all media players would adopt it.
BTW, not only does this player have HDMI and Composite out, but it also has Component as well!!!! Which ended up working best for my setup.
Rating: 5 / 5
This is the ideal product for anyone wanting a bulletproof media player. You need a cat5 connection to your network, but wireless is pretty much useless for video anyway and hardwired is way more reliable. I moused a cat5 down an adjacent RF aerial trunking in the wall.
It found my LaCie NAS drive immediately and a PC and laptop I happened to have on when I hooked it up. It plays just about any media with no skips or jumps or stuttering. The best features for me were the screensaver for my plasma and reliable album art. Finding an album on a text only menu is no fun with hundreds to search through, and what’s the point of a TV menu without album art? It’s surprising how few media players have any of these features, I’ve looked!
It could do with an RF passthrough to easily make music available in other rooms with a TV, and the navigation facility could do with a bit more thought, but overall I have not found a better media player anywhere near the pricepoint wired or wireless.
Rating: 5 / 5